M5Atom+PIR UnitをSinric ProでAlexaのモーションセンサーにする
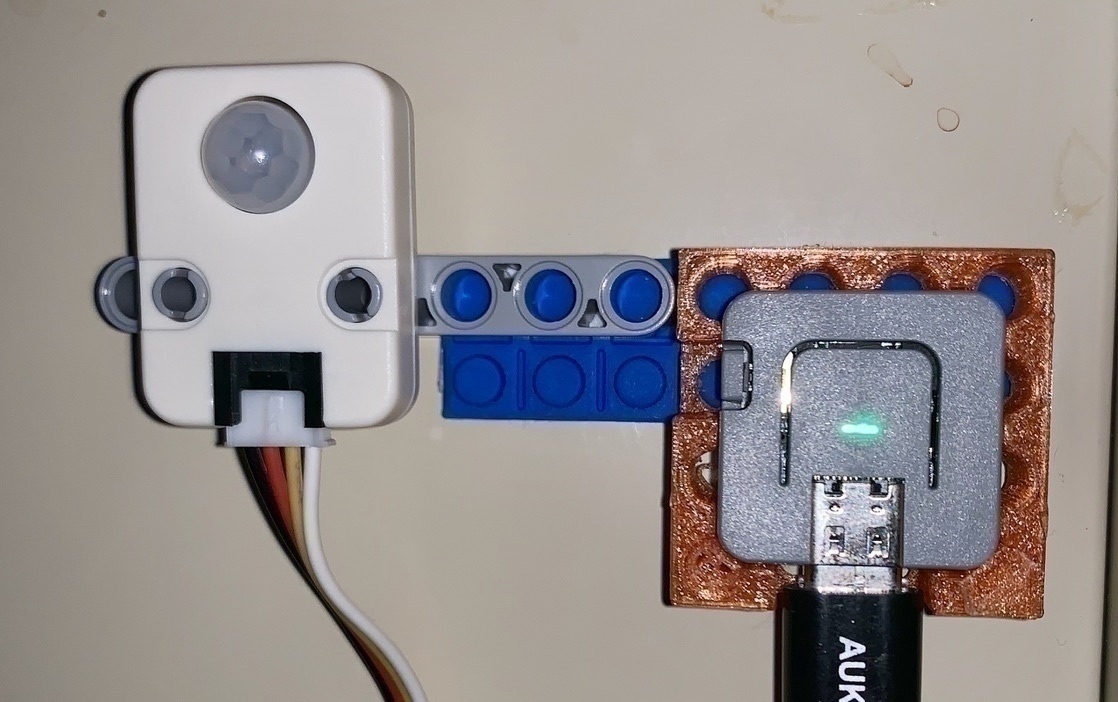
M5Atom+PIR UnitをSinric ProでAlexaのモーションセンサーにする

M5Atom LitePIRセンサユニット を使って、SwitchBot を動かして照明を人感センサー付きにする、という記事 を最近掲載したばかりですが、実は人感センサーを付けたかったリビングには他にも1つ、赤外線リモコンで操作する照明があって、そちらも同時に人感センサーで制御したいなと思いました。そちらの照明はすでに、SwitchBotハブプラス でAlexa対応しており、SwitchBotもAlexaから制御できるので、このさいM5AtomをAlexaに対応したモーションセンサーにしてしまえば、Alexaの定型アクション 機能を使って、複数の照明を同時に制御できそうです。検索していたら、Sinric Pro という、Raspberry PiやESP32などをAlexaのスマートホームスキルに対応したセンサーやスイッチとして動作させるためのサービスがあったので、そちらを使ってM5Atom + PIRセンサーユニットをAlexaのスマートホームスキルで使えるモーションセンサーにしてみました。

作り方

Sinric Proでは、現在のところ5デバイスまでは無料で使えるようです。アカウントを作って、ダッシュボードでデバイスを追加します。追加するときにデバイスタイプを聞かれるので、Motion Sensorを選択しておきます。デバイスIDが発行されるので、それを後ほどArduinoスケッチの中に記載します。
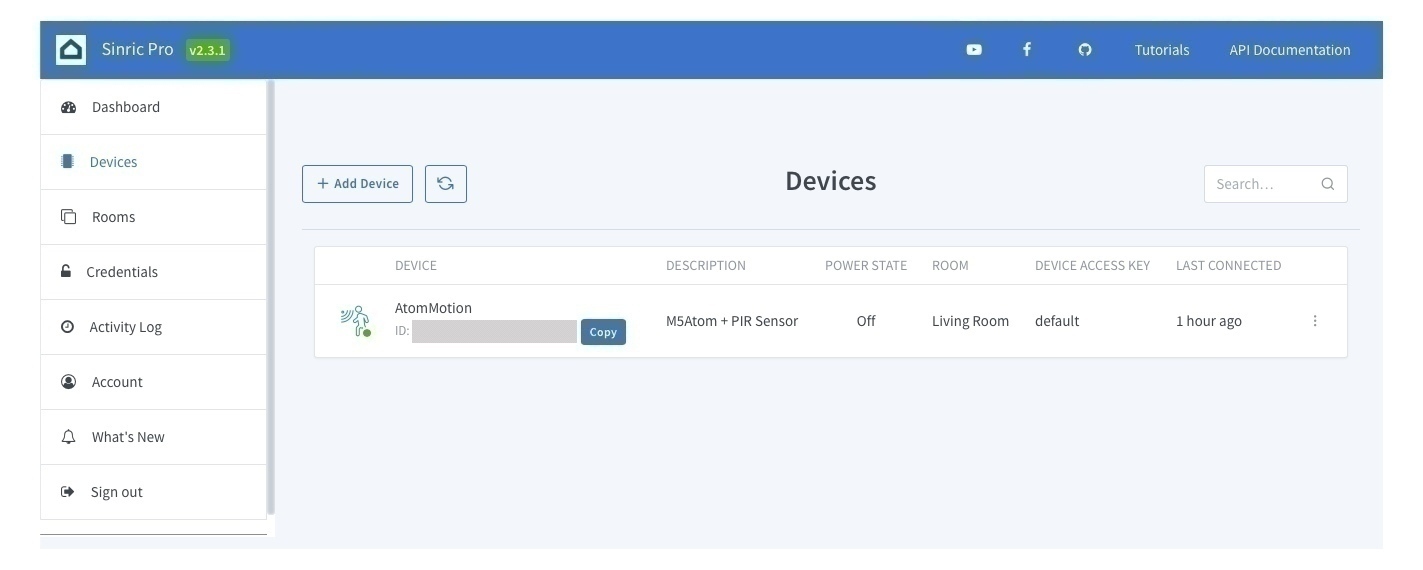

また、アカウントの識別のためのApp Key, App Secretも取得しておき、後ほどスケッチの中に書きます。


あとは、ESP32ベースのデバイスとPIRセンサーを用意すれば、そのデバイスをAlexaのスマートホームスキルのモーションセンサーとして認識されることができます。

スケッチ

いつもどおりGistに置いています。
スケッチはM5Atomのライブラリのほか、Sinric Proのライブラリもインクルードします。これは通常のArduinoのライブラリからインストールできます。
今回はWiFi接続が必要なので、SSIDとパスフレーズをスケッチ中に記載しています。先ほど取得したAPP_KEY, APP_SECRET, それにデバイスID(MOTIONSENSOR_ID) もスケッチ冒頭で記載します。

#include <M5Atom.h>
#include <WiFi.h>
#include <SinricPro.h>
#include <SinricProMotionsensor.h>
#define WIFI_SSID "YOUR_SSID"
#define WIFI_PASS "YOUR_WIFIPASS"
#define APP_KEY "YOUR_APPKEY" // Should look like "de0bxxxx-1x3x-4x3x-ax2x-5dabxxxxxxxx"
#define APP_SECRET "YOUR_APP_SECRET" // Should look like "5f36xxxx-x3x7-4x3x-xexe-e86724a9xxxx-4c4axxxx-3x3x-x5xe-x9x3-333d65xxxxxx"
#define MOTIONSENSOR_ID "YOUR_DEVICEID" // Should look like "5dc1564130xxxxxxxxxxxxxx"
#define MOTIONSENSOR_PIN 32 // M5Atom + M5 Motion Sensor Unit
bool myPowerState = true; // assume device is turned on
bool lastMotionState = false;
unsigned long lastChange = 0;
uint8_t DisBuff[2 + 5 * 5 * 3];
bool onPowerState(const String &deviceId, bool &state) {
Serial.printf("device %s turned %s\r\n", deviceId.c_str(), state?"on":"off");
return true; // indicate that callback handled correctly
}
void handleMotionsensor() {
if (!myPowerState) return; // if device switched off...do nothing
unsigned long actualMillis = millis();
if (actualMillis - lastChange < 250) return; // debounce motionsensor state transitions (same as debouncing a pushbutton)
bool actualMotionState = digitalRead(MOTIONSENSOR_PIN); // read actual state of motion sensor
if (actualMotionState != lastMotionState) { // if state has changed
Serial.printf("Motion %s\r\n", actualMotionState?"detected":"not detected");
if(actualMotionState != 0) {
setBuff(0x00, 0xff, 0x00); // if any motion detected, set color to green.
M5.dis.displaybuff(DisBuff);
} else {
setBuff(0x80, 0x00, 0x80); // if any motion detected, set color to magenda.
M5.dis.displaybuff(DisBuff);
}
lastMotionState = actualMotionState; // update last known state
lastChange = actualMillis; // update debounce time
SinricProMotionsensor &myMotionsensor = SinricPro[MOTIONSENSOR_ID]; // get motion sensor device
myMotionsensor.sendMotionEvent(actualMotionState);
}
}
// setup function for WiFi connection
void setupWiFi() {
Serial.printf("\r\n[Wifi]: Connecting");
WiFi.begin(WIFI_SSID, WIFI_PASS);
while (WiFi.status() != WL_CONNECTED) {
Serial.printf(".");
delay(250);
}
IPAddress localIP = WiFi.localIP();
Serial.printf("connected!\r\n[WiFi]: IP-Address is %d.%d.%d.%d\r\n", localIP[0], localIP[1], localIP[2], localIP[3]);
}
// setup function for SinricPro
void setupSinricPro() {
// add device to SinricPro
SinricProMotionsensor& myMotionsensor = SinricPro[MOTIONSENSOR_ID];
// set callback function to device
myMotionsensor.onPowerState(onPowerState);
// setup SinricPro
SinricPro.onConnected([](){ Serial.printf("Connected to SinricPro\r\n"); });
SinricPro.onDisconnected([](){ Serial.printf("Disconnected from SinricPro\r\n"); });
SinricPro.begin(APP_KEY, APP_SECRET);
}
void setBuff(uint8_t Rdata, uint8_t Gdata, uint8_t Bdata)
{
DisBuff[0] = 0x05;
DisBuff[1] = 0x05;
for (int i = 0; i < 25; i++)
{
DisBuff[2 + i * 3 + 0] = Rdata;
DisBuff[2 + i * 3 + 1] = Gdata;
DisBuff[2 + i * 3 + 2] = Bdata;
}
}
void setup() {
Serial.begin(115200);
M5.begin(true, false, true);
delay(10);
setBuff(0xff, 0x00, 0x00); // set color to red.
M5.dis.displaybuff(DisBuff);
// PIR sensor unit connected to M5Atom port.
pinMode(MOTIONSENSOR_PIN, INPUT);
setupWiFi();
setupSinricPro();
setBuff(0x00, 0xff, 0x00); // after initializing, set color to green.
M5.dis.displaybuff(DisBuff);
}
static uint32_t count = 0;
static bool isdark = false;
void loop() {
handleMotionsensor();
M5.update();
SinricPro.handle();
delay(500);
}

このスケッチをM5Atomに書き込んだら、あとは電源をつなげるだけで動作しはじめます。前回の工作と同じように、動きを検知しているときはLEDを緑で点灯するようにして、検知していない時は紫にしています。

Alexaへの登録

Alexaのモーションセンサーとして使うには、Sinric ProのAlexaスキル をAlexaで有効にする必要があります。スマートフォンのAlexaアプリなどでこのスキルを有効にしてから、デバイスを検索すると、モーションセンサーが見つかるはずです。あとは、定型スキルのトリガーなどに活用することができます。

感想

今回はBLEなどは使わないので、スケッチもシンプルに書けて、バグに悩まされることもなく一発で期待通りの動作をしました。Sinric Proはよくできていて、ほぼコールバック関数を書くだけでデバイスをAlexa対応にでき、継続して利用していくことができるので、これからもっと使いたいと思います。